Part 3: Paint Correction – Creating the Perfect Canvas
If you’ve followed Parts 1 and 2 of this series, your vehicle is now clean and free from bonded contaminants. At this stage, many DIY enthusiasts are tempted to reach straight for the ceramic coating.
Resist the urge.
A ceramic coating doesn’t hide imperfections—it preserves them. Every swirl mark, light scratch and patch of oxidation that remains in the paint will still be visible after the coating cures. In fact, because ceramic coatings add gloss and clarity, they often make existing defects even more noticeable.
This is why paint correction is arguably the most important stage in the entire process.
What is Paint Correction?
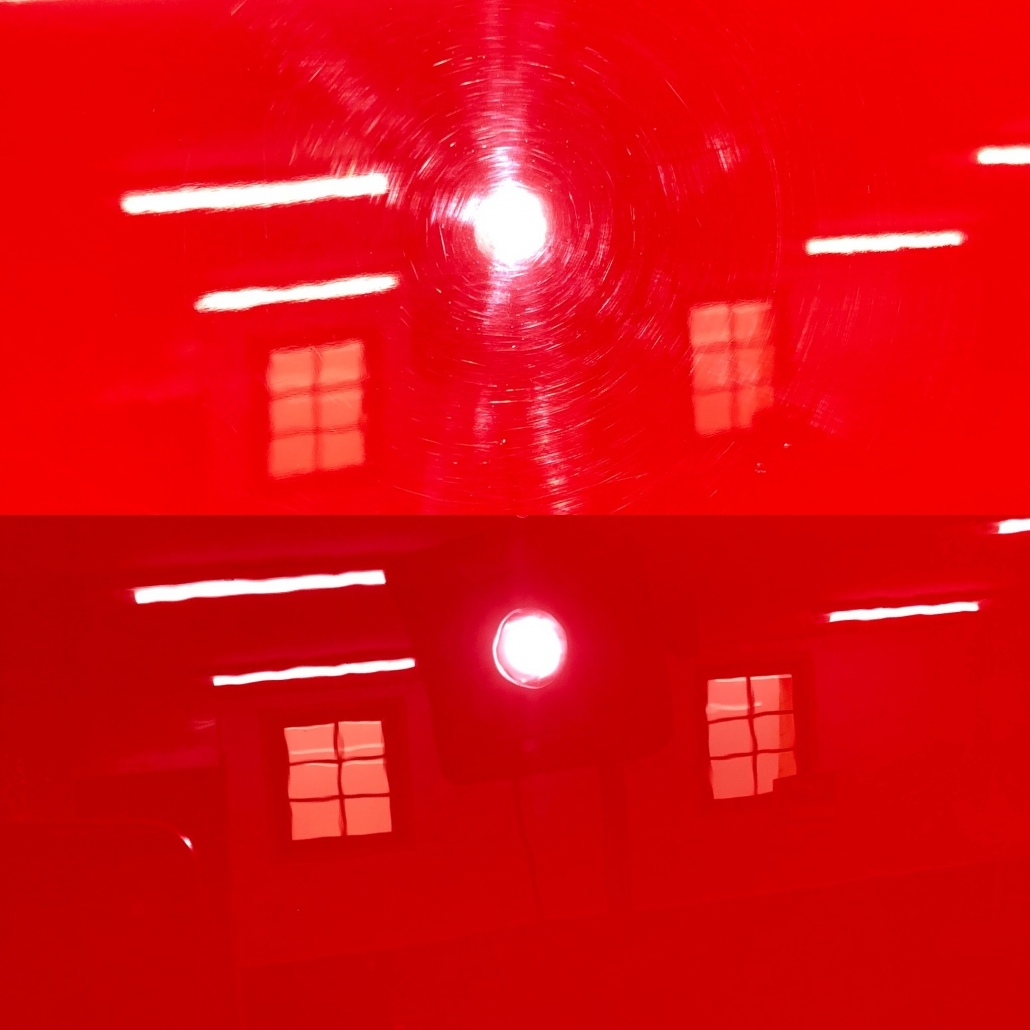
Paint correction is the process of removing imperfections from the vehicle’s clear coat through machine polishing. Rather than filling scratches with temporary products, paint correction carefully removes an extremely thin layer of clear coat to permanently level the surface.
Depending on the condition of your vehicle, paint correction can remove or significantly reduce:
- Swirl marks caused by improper washing
- Fine scratches
- Water spot etching
- Light oxidation
- Holograms from previous polishing
- Minor paint defects
The result is a deep, glossy finish that provides the ideal foundation for your ceramic coating.
Before You Begin
Unlike washing and decontamination, paint correction requires specialised equipment and considerably more experience. Machine polishing generates heat and removes clear coat, meaning mistakes can be expensive—and in some cases irreversible.
Before starting, make sure you have:
- Dual Action (DA) Polisher
- Polishing pads (cutting, polishing and finishing)
- Machine polish or compound
- Panel wipe solution
- High-quality microfiber cloths
- Inspection lighting
A paint depth gauge is also highly recommended, particularly if you’re working on an older vehicle or one with an unknown paint history.
Step 1: Inspect the Paint
Good lighting is essential.
Move the vehicle into bright daylight or use dedicated detailing lights to inspect every panel. What looks perfect in a garage can reveal dozens of swirl marks under direct lighting.
Identify the areas that need the most attention before choosing your polishing combination.
Step 2: Perform a Test Spot
Professional detailers rarely polish the entire vehicle immediately.
Instead, they choose a small section—usually around 40 cm × 40 cm—and experiment with the least aggressive combination of pad and polish that delivers the desired result.
This approach saves time and preserves as much clear coat as possible.
Remember: always start with the least aggressive method before moving to heavier compounds.
Step 3: Machine Polish
Working one section at a time, spread the polish evenly before gradually increasing the machine speed.
Keep the pad flat against the surface and move slowly using overlapping passes. Avoid excessive pressure and allow the machine and polish to do the work.
Once the polish has been worked through, wipe away the residue using a clean microfiber cloth and inspect the results under proper lighting.
If necessary, repeat the process before moving on to the next section.
Step 4: Remove Polishing Oils
After polishing, the paint may appear flawless, but polishing oils can temporarily mask defects and interfere with ceramic coating adhesion.
Spray each panel with a dedicated panel wipe solution and wipe clean using a fresh microfiber cloth.
This removes any remaining oils and reveals the true condition of the paint while ensuring the coating can bond directly to the clear coat.
Is Paint Correction Really Necessary?
Technically, no.
You can apply a ceramic coating to paint that hasn’t been corrected.
However, it’s worth remembering what ceramic coatings are designed to do: they lock the paintwork into its current condition.
If your vehicle has swirl marks and scratches today, those same imperfections will still be there tomorrow—only protected beneath a highly durable coating.
For a brand-new vehicle with minimal defects, a single-stage polish may be all that’s required. Older or neglected vehicles, however, often benefit from a more intensive multi-stage correction.
DIY or Professional?
This is the stage where many enthusiasts decide whether to continue themselves or hand the vehicle over to a professional detailer.
A quality dual-action machine polisher, pads, compounds and inspection lighting represent a significant investment. More importantly, achieving a truly flawless finish takes patience, experience and many hours of practice.
Professional detailers have already invested in the equipment, products and expertise needed to safely maximise your paint’s finish while minimising unnecessary clear coat removal.
If your goal is simply to protect your daily driver, a light enhancement polish may be sufficient. If you’re looking for a near-showroom finish before applying a premium ceramic coating, professional correction is often money well spent.
Moving Forward
With the paint corrected and every polishing oil removed, your vehicle is finally ready for the stage you’ve been working towards from the very beginning.
In Part 4, we’ll cover the ceramic coating application itself—from preparing your working environment and applying the coating correctly to levelling, curing and the aftercare needed to ensure your coating delivers years of protection and gloss.