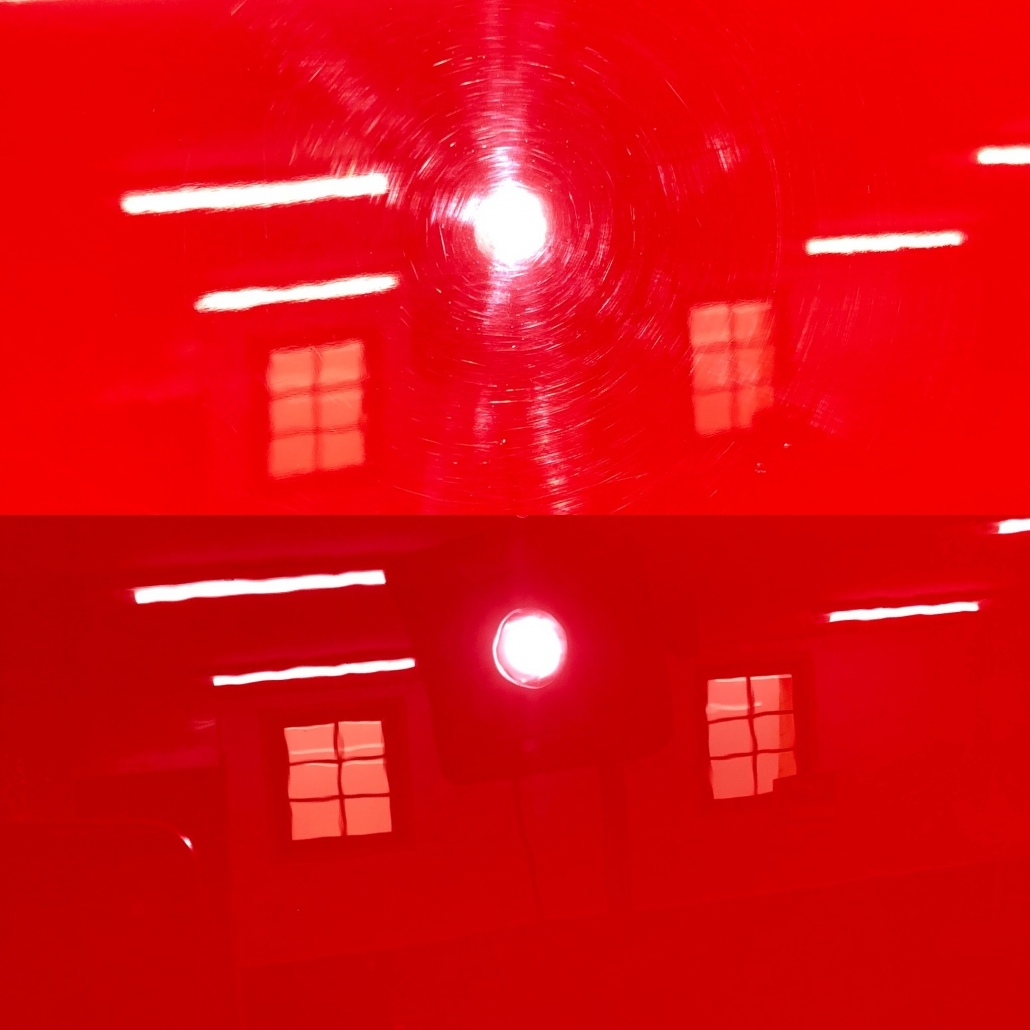
Congratulations — your car is now squeaky clean and free of contaminants (if you’ve followed Step 2). But look closely under a bright light… see those faint spider webs on your paint? Those aren’t battle scars — they’re swirl marks.
Time for Step 3: Paint Correction — where we make your paint so glossy, it’ll practically reflect your soul.
🔧 What You’ll Need
Here’s your correction toolkit (and your new gym workout):
A Dual-Action buffer – because your arm isn’t a machine (trust us, we’ve tried).
Compound – for the heavy lifting.
Finishing Polish – for that silky, deep gloss.
Foam Pads – one for cutting, one for finishing.
Panel Wipe – to clean up any oily leftovers.
Microfiber Towels – soft enough to make clouds jealous.
Bright lights and a calm, dust-free zone.
🧩 Step-by-Step Paint Correction
1. Check Your Paint’s Mood
Grab a light and inspect the paint from different angles. Swirls, light scratches, and haze — those are your targets. Tape off rubber trim and badges unless you like polishing residue tattoos.
💡 Pro Tip: The fewer coffee jitters you have, the smoother your machine passes will be.
2. Test Spot Time
Before you go full detail-hero, test a small area. Start gentle with Q²M Polish and a soft pad. If the paint laughs at your effort, bring in the big guns — Q²M Compound is with a cutting pad.
Find what works best, then repeat across the car.
3. Polish Like a Pro
Add 3–4 pea-sized drops of product (don’t go overboard).
Spread it on low speed, then bump up your DA polisher to a moderate pace. Move in slow, overlapping passes — side to side, then up and down — until the polish turns clear.
Wipe off with a Pinky Microfiber Towel and admire your work. Instant dopamine.
4. Refine the Shine
Now that you’ve erased the uglies, switch to Q²M Polish on a soft pad. This is where the magic happens — depth, clarity, and that “wet look” finish that makes people ask if you just had your car repainted.
5. Wipe It Down
After polishing, use Q²M Prep to remove any oils or residue. This ensures your upcoming ceramic coating sticks like it’s meant to.
💡 Pro Tip: Straight-line wipes, gentle pressure, and clean towels.
✨ The Result
If you’ve done it right, your paint should now look like black glass (or red glass, or blue glass — you get the idea). Every swirl mark gone. Every panel gleaming. You’ve officially unlocked the “Mirror Finish” achievement.
🏁 Final Thoughts
Paint correction takes time, patience, and a bit of arm endurance, but the payoff? Unreal. With Prestige Detailing’s compounds, pads, and tools, you’ll look like a pro — even if you’re just doing this on the weekend.
Next up: Step 4 – Applying the Ceramic Coating — where we seal the deal and give your ride years of jaw-dropping shine and protection.